AIDA Capture Lab

AIDA Capture Lab is a service of AIDA - Netwerk Digitaal Preserveren, operated by meemoo
Hard disks
This manual and setup is meant for hard drives with a IDE and SATA interface. It can also be used for USB external hard drives, but then the enclosure of the hard disk should be removed. The IDE or SATA interface is much faster than USB.
This setup can’t be used for M2.SATA disks.
Hardware
There are two possible setups: only using a write blocker/bridge or using a docking station and a write blocker.
Setup #1 - only using a write blocker/bridge
Write blocker
| Model | Tableau Forensic SATA/IDE Bridge T35u |
|---|---|
| Media | Drives with SATA or IDE interface |
| Interface | SATA IDE |
| Connector | USB 3.0 |
| Cable | USB type B to USB type A |
| Workstation connection | Can be connected directly with the workstation (which has a USB type A female connection) |
| Power | DC input: 5-pin Mini-DIN connector |
| documentation | user guide |
Setup #2 - docking station
Docking station
| Model | 4-Bay USB 3.0 SATA 2.5”/3.5” SSD/HDD Docking Station |
|---|---|
| Media | 2.5” SATA hard disks 3.5” SATA hard disks 2.5” IDE hard disks 3.5” IDE hard disks |
| Interface | SATA IDE |
| Connector | USB 3.0 |
| Cable | USB type B to USB type A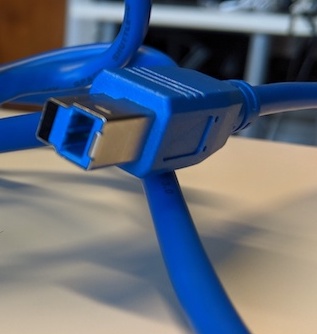 |
| Workstation connection | Via USB write blocker |
| Power | via DC pin |
Write blocker
| Model | Tableau Forensic USB 3.0 Bridge T8U |
|---|---|
| Media | Drives with USB (3.0 and older) connectors |
| Interface | USB |
| Connector | USB 3.0 |
| Cable | USB type B to USB type A |
| Workstation connection | Can be connected directly with workstation (which has a USB type A female connection) |
| Power | DC input: 5-pin Mini-DIN connector |
| Documentation | user guide |
Workstation
A Linux computer, preferably running the Bitcurator Environment (We use a Dell XPS)
Software
There are two possible workflows: one where you create a disk image of the whole disk, or one where you only copy the files on the disk.
Workflow #1: Guymager
Guymager in the Bitcurator Environment is used to create disk images of hard disks. This implies that you create an identical copy of the hard disk
Advantages:
- You’ve got an identical copy of the disk and also the original environment is preserved, like the history of the files, metadata and file system. Old Macintosh file systems, for example, don’t have file extensions to identify files. In stead this information is stored in metadata in the file system. That’s why for old Macintosh file systems, it’s important to preserve the original file system.
- Less risk of infections with viruses, because the hard disk is not mounted and individual files are not exported.
- This means also that you cannot remove accidentially an indivual file of the disk.
- Because it’s not necessary to mount the hard disk, you can create copy’s of hard disks that are damaged, with filesystem that are not compatible with the workstation, and whether or not you have read and write access.
Workflow #2: Grsync
Grsync in the Bitcurator Environment is a GUI alternative to rsync. It is used to copy safely files from one computer to another. (G)rsync checks by means of checksums if the files are copied correctly and can copy the original metadata (e.g. last modification date) without modification.
Advantages:
- You only preserve the actual files on the disk (so no empty space)
- Therefore the transfer of the files is faster
- (G)rsync is more configurable. For example, you can provide a list of files or file formats that you do not want to be transferred (e.g. system files).
rsyncis a command line tool and therefore automatable.
Disadvantages:
- The original environment of the hard disk will be lost and thus also the metadata that is stored in the file system
- You cannot use this workflow if the file system of the disk is not compatible with the work station.
- When a hard disk is damaged and cannot be mounted by the workstation, this workflow is not usable.
- Risks for infections with viruses and accidentally removing files.
We prefer creating disk images, but you can use this workflow if you don’t have a lot of time and/or if you’re working on recent hard disks whose file system is compatible with that of the workstation.
We discourage the use of this workflow if you’re working on Mac formatted hard disks.
Workflow
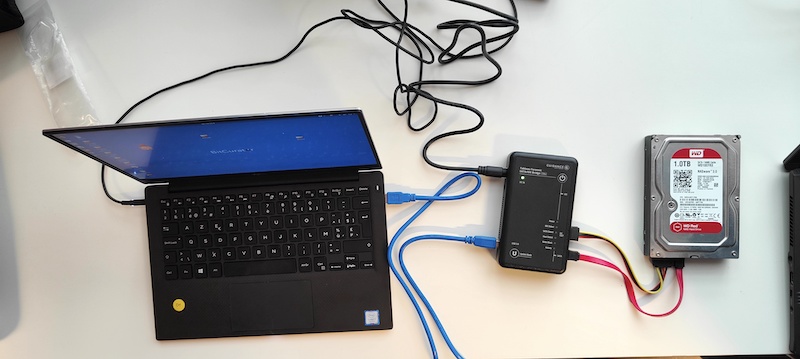
Setup #1 - Write blocker
Step 1: Connect the hard disk to the write blocker
- Choose the appropriate cable
- Use the IDE cable when you’ve got an IDE hard disk
- Use the SATA cable when you’ve got a SATA hard disk
- Connect the hard disk to the write blocker (right side)
Step 2: Connect the write blocker to the workstation
- Connect the write blocker to the workstation using the blue USB 3.0 cable (left side)
- Connect the DC power supply to the write blocker and plug it into an outlet
- Press the power button on the write blocker
Step 3: Create a disk image or copy the files
Decide if you want to create a disk image or just copy all the files. We recommend creating a disk image.
- Create a disk image using Guymager
- Copy all files safely using Grsync. If you’re familiar with the command line and
rsync, you can also usersync. Use the archive function viarsync -a
Step 5: Remove the hard disk
- If the hard disk is mounted, remove it safely
- Power off the write blocker
- Disconnect the hard disk from the write blocker
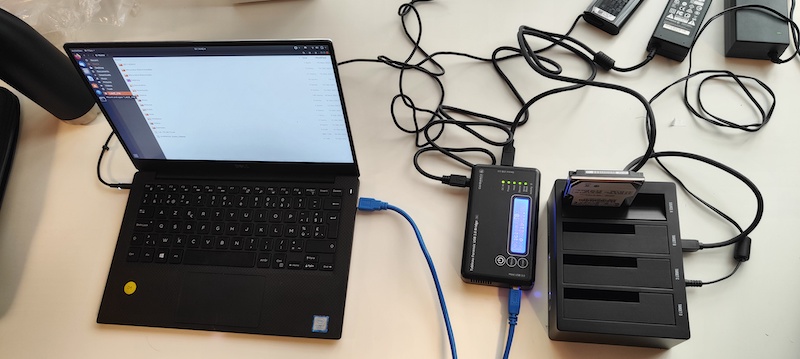
Setup #2 - Docking station
Step 1: Connect the docking station to the workstation
- Connect the write blocker to the workstation using the blue USB 3.0 cable (side: Host USB 3.0)
- Connect the DC power supply to the write blocker (bottom)
- Plug the power cable into a power socket
- Press the power button on the write blocker
Step 2: Connect the docking station to the write blocker
- Connect the docking station to the write blocker using the USB cable (side: Device USB 3.0)
- Connect the power cable to the drive abd plug the power cable into a power socket.
Step 3: Create a disk image or copy the files
- Plug one or more hard drives into the docking station. Make sure that the hard drive connectors match those of the docking station.
- Decide if you want to create a disk image or just copy all the files. We recommend creating a disk image.
- Create a disk image using Guymager
- Copy all files safely using Grsync. If you’re familiar with the command line and
rsync, you can also usersync. Use the archive function viarsync -a
Step 4: Remove the hard disk(s)
- If the hard disk is mounted, remove it safely
- Go to the workstation and open a file explorer window
- Right click on the device in the left navigation sidebar
- Select eject
- Power off the write blocker
- Remove the hard disk(s) from the docking station