AIDA Capture Lab

AIDA Capture Lab is a service of AIDA - Netwerk Digitaal Preserveren, operated by meemoo
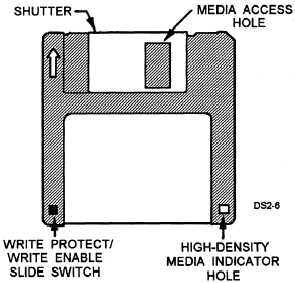
3.5 inch high density diskette
Hardware
Floppy drive
| Model | Freecom USB Floppy Disk Drive 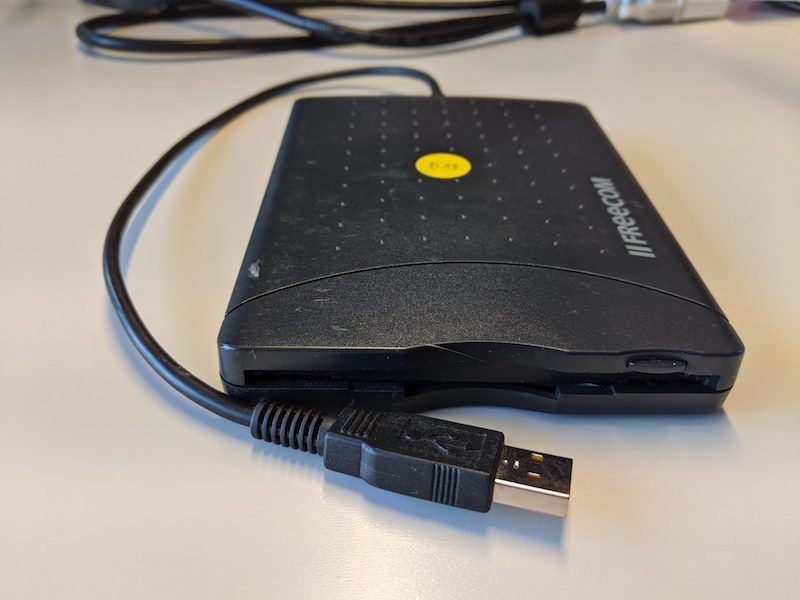 |
|---|---|
| Media | 3.5 inch HD floppies 3.5 inch IBM formatted double density floppy disk |
| Interface | USB |
| Connector | USB 1.1 |
| Cable | n/a - built in |
| Workstation connection | Can be connected directly with write blocker (which has a USB type A female connection) |
| Power | n/a |
| Documentation |
| Model | IBM Diskette Drive Portable 13N6752 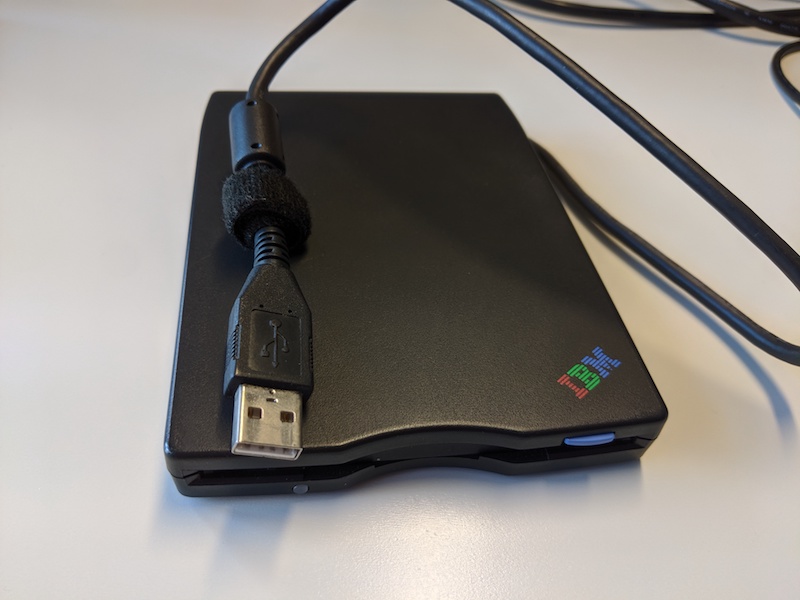 |
|---|---|
| Media | 3.5 inch HD floppies 3.5 inch DOS or Windows formatted double density floppies |
| Interface | USB |
| Connector | USB 1.1 or 2.0 |
| Cable | n/a - built in |
| Workstation connection | Can be connected directly with write blocker (which has a USB type A female connection |
| Power | n/a |
| Documentation |
Write blocker
| Model | Tableau Forensic USB 3.0 Bridge T8U 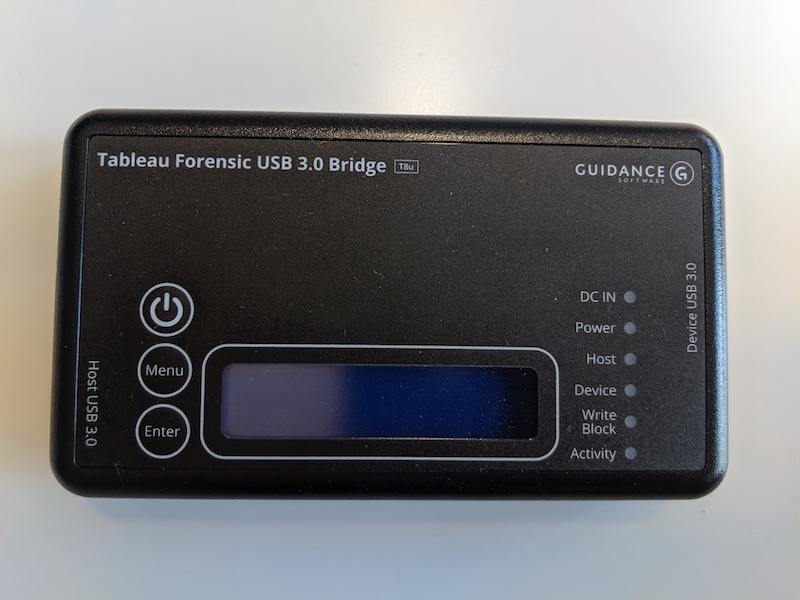 |
|---|---|
| Media | Drives with USB (3.0 and older) connectors |
| Interface | USB |
| Connector | USB 3.0 |
| Cable | USB type B to USB type A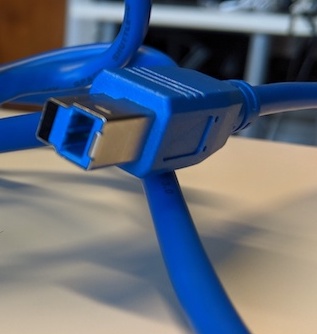 |
| Workstation connection | USB cable |
| Power | DC input: 5-pin Mini-DIN connector |
| Documentation | user guide |
Workstation
A Linux computer, preferably running the Bitcurator Environment (We use a Dell XPS)
Software
Guymager in the Bitcurator Environment
Workflow
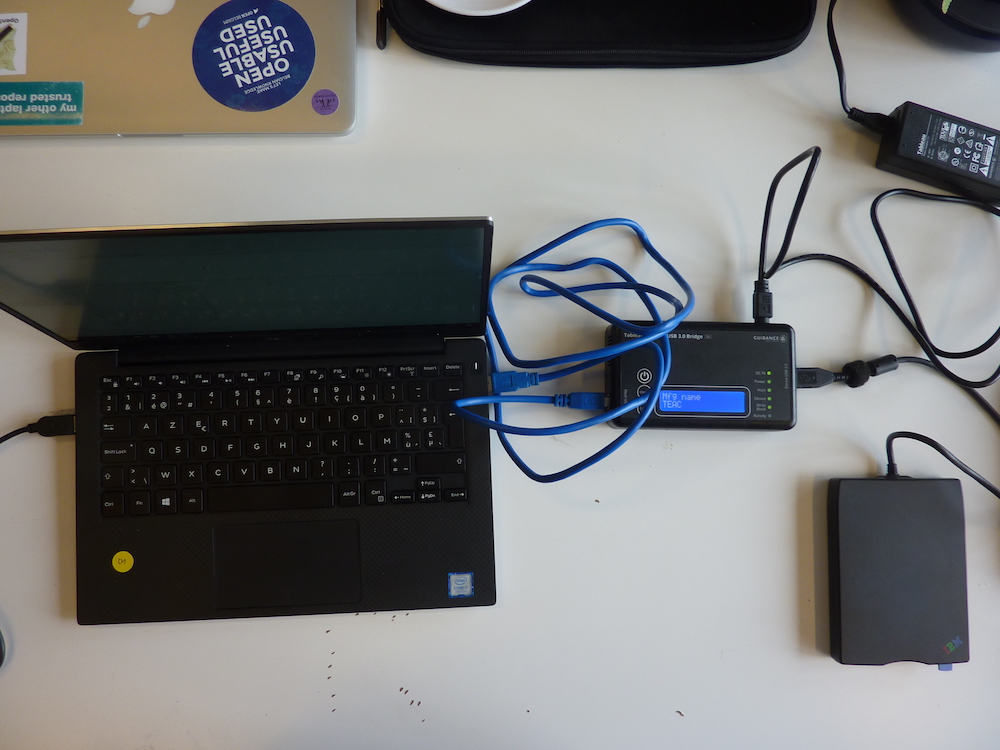
Step 1: Connect the write blocker to the workstation
- Connect the write blocker to the workstation using the blue USB 3.0 cable (side: Host USB 3.0)
- Connect the DC power supply to the write blocker (bottom)
- Plug the power cable into a power socket
- Press the power button on the write blocker
Step 2: Connect the Floppy USB Drive to the write blocker
Connect the Floppy USB Drive to the write blocker using its USB cable (side: Device USB 3.0)
Step 3: Prepare the floppy disk
- Take a floppy disk
- Slide the switch on the disk bringing it in read-only state. Look for a tiny black sliding tab in a square hole in the disk’s lower left corner. Slide the tab with a pencil or your thubmnail so that the hole is uncovered.
Step 4: Create a disk image
- Insert the floppy disk in the Floppy USB Drive. Make sure that you insert the floppy disk with the shutter side in the drive and that the side of the floppy disk with the label is facing upwards.
- Create a disk image using Guymager
Step 5: Eject the floppy disk
- Press the button on the Floppy USB Drive to eject the disk
- If that doesn’t work:
- Go to the workstation and open a file explorer window
- Right click on the device in the left navigation sidebar
- Select eject
- Press again on the button of the floppy drive
- If that doesn’t work either:
- Power off the write blocker
- Power on the write blocker
- Immediately press the button on the floppy drive